Formats & Image Data · Tool 12
Sheet-Cutting and Waste Calculator
About this calculator
Cutting smaller sheets of film from a larger sheet: On paper, it sounds simple, but the layout determines how many sheets will actually fit. Here, you can consider the source format, target dimensions, margins, and cutting waste all at once.
The calculator compares regular grids and mixed arrangements consisting of two rectangular zones. It displays the best layout found. I deliberately do not call this a guaranteed optimal layout: In some cases, a different nesting method might yield better results.
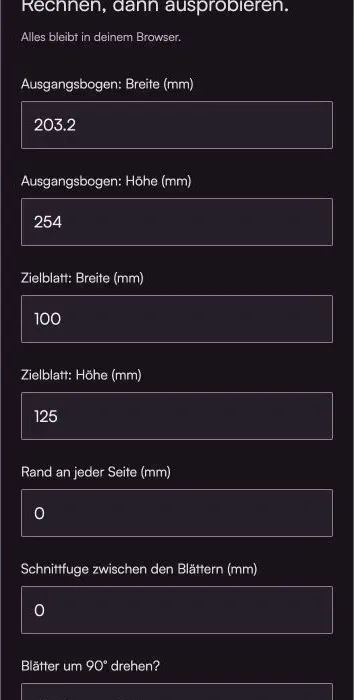
Do the math, then give it a try.
Everything stays in your browser.The calculator is loading …
Your result
100% / Select "Actual Size." Turn off headers and footers. Then check the 100-mm distance with a ruler.
How to Use the Calculator
- Measure the actual starting radius and the required outer film dimension for your holder. Enter both values in millimeters.
- Set a margin on each side and the necessary spacing between adjacent pages. Allow for a 90-degree rotation if your workflow permits it.
- Check the number of sheets and the cutting layout. Transfer the plan to paper first before cutting the film in the darkroom.
What's Behind the Bill
Area yield = number of leaves × target width × target height / initial area × 100%
The usable area is calculated after subtracting the margin on all four sides. The selected cut line remains clear between sheets. The reported waste includes both unused scraps and margin and cutting losses.
The area-based upper limit does not take the layout into account. It simply specifies the maximum number of target sheets that would be possible based on area. If the layout plan reaches this value, the number of sheets is thereby determined. If it falls short of this value, that does not necessarily mean that a better plan exists.
Trade terms such as "4 × 5 inches," "film outer dimensions," and "exposed image area" refer to different sizes. When cutting the film, use the dimension that actually fits into your holder. A nominal dimension that’s just within the range is not a reliable guide for this.
When rotating and cutting, it’s easy to lose track of the orientation and the original notch mark. You must therefore clarify the emulsion side, holder fit, and clear labeling in your actual workflow. The linked manufacturer information is intended to help you work with flat film; it does not constitute an endorsement of this cutting algorithm.
An example to work through
From a sheet measuring 203.2 × 254 mm, four sheets measuring 100 × 125 mm fit into a 2-by-2 grid without margins or cutting allowances. The yield is approximately 96.88%.
Here's what you should keep in mind
- No guarantee of the global optimum among all possible arrangements of rectangles.
- A maximum of 5,000 leaves in terms of area; the graph shows no more than 500.
- The plan is a schematic diagram and not a scale-accurate cutting template.
Frequently Asked Questions (FAQ)
Can I always cut four 4×5-inch sheets from an 8×10-inch sheet of paper?
The nominal dimensions provide a suitable quartering, but the commercial designation alone does not guarantee a proper holder fit. Check the actual source dimensions and the required outer dimensions of the film. Margins and cutting loss can also affect the calculations. First, test the cutting plan using paper and your film holder.
Why do fewer leaves fit than the surface area calculation would suggest?
A residual area that is large enough may be too narrow or have an unfavorable shape. In addition, the edge and the cut joint require space. The area-based upper limit ignores this geometry. The plan shown is the best grid or two-zone arrangement found, not a guaranteed optimum for every conceivable nesting scenario.
What should I enter for the margin and trim allowance?
The margin is subtracted from each of the four outer sides. The cutting allowance is the distance that must be left between adjacent target sheets—for example, to account for material loss or your cutting device. The appropriate value depends on your tool. Do not simply enter zero if the actual workflow requires more space.
How do I keep track of the emulsion side and the notch mark while cutting?
Before cutting, determine how you can reliably identify the emulsion side and orientation of each individual sheet. Due to the cutting process, the original notch may be missing from most pieces. First, practice handling and fitting the pieces on a suitable sample. The calculator shows an arrangement but does not specify a new notch position or a safe cutting technique.
Read More & Sources
If you'd like to learn more about the basics, you'll find helpful explanations here.